JMP-rope, the hardware
The hardware of the first JMP-rope prototype is very simple:
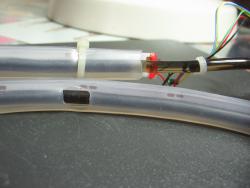
- A jump rope with large ball bearing handles, to be hacked with zip-ties. Be sure that the rope itself is not too thick, a leather one is mostly OK, but I actually used two ropes for the prototype:
- A DOMYOS Jump-in Skipping Rope for the handles, it has nice handles but the rope itself is a little too thick and stiff.
- A DOMYOS Basic Skipping Rope for the actual rope: thin and flexible.
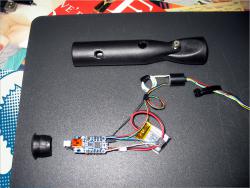
- A micro-controller small enough to fit inside the rope handle: I used a Trinket, relying on wire wrapping to do the needed connections.
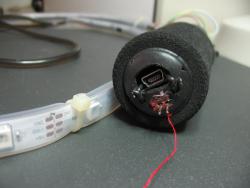
- A small battery: I used a 150mAh lipo battery, a bigger one would have not fit into the handle. A charger for the battery is also good to have, maybe in a second prototype I'll try to stick one inside the handle too; with the current prototype the battery has to be removed in order to be recharged.
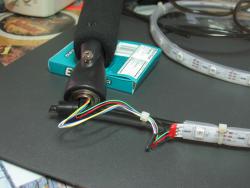
- A LED strip, like a 30 LEDs/m Neopixel strip to tie to the rope. One meter strip will cover one side of the rope. With a beefier battery a 60 LEDs/m strip could be used. An external battery pack could also be used and kept into an arm pocket, one of those used by runners to carry cell phones or MP3 players.
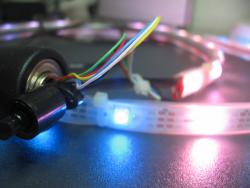
- A small slip-ring, it has to fit inside the handle; it allows the rope to spin while still keeping electrical contact between the micro-controller and the LED strip. I used a short bolt from outside the handle to hold the slip-ring in place. Ironically the bolt gives a lightsaber kind of look to the JMP-rope handle.
- A small momentary push button.
- Two pins and a jumper as the ON switch.
- Zip-ties and hot glue.
I thought about using a BlinkyTape but the small battery would have not been enough for the 60 LEDs, and also the slip ring would have been necessary anyway, making the cost go higher. I did steal some code from Blinkinlabs, tho.
See the pictures below to have an idea of the building process.
If you are into hardware and want to help me realize a better prototype, get in touch. The Trinket is fine but I think more stuff could be squeezed in by using a custom board, or a Trinket daughter-board.



![Validate my RSS feed [Valid RSS]](https://ao2.it/sites/default/files/valid-rss-rogers.png)

Comments
Post new comment